
Whether you already store all your inventory in FileMaker or are planning to build an application for inventory management, at some point, you need to decide how to get those products online. WooCommerce is the most popular plugin out there that offers an easy way to create an online store on the WordPress website. But how do you upload all those products from FileMaker? There are many options, from doing it manually to buying a ready-to-use FileMaker module for WooCommerce. Or, if you want to automate the process but don’t want to buy any third-party products, you can do so by using FileMaker’s native JSON functions and Insert from URL script step.
WooCommerce has a great REST API that can be used to upload, update, and delete products. Their handy documentation outlines other calls to manage an online store, but we will start with the basics. In this tutorial, we will start with the authentication, create a simple product in FileMaker, add pictures, and upload it to the website via the API. After that, we will briefly cover other possible enhancements — variable products, variations with multiple photos, tags, and SEO optimization.
WooCommerce Authentication
Before we can start creating products, it is essential to understand how to authenticate your calls. WooCommerce offers a few ways to do this, but we will use the most popular approach — REST API keys. Follow this guide to generate your keys, give them a meaningful name, choose an admin user, and make sure you choose Read/Write Access. Keep in mind that if you delete the WordPress user associated with an API key, the API key will stop working.
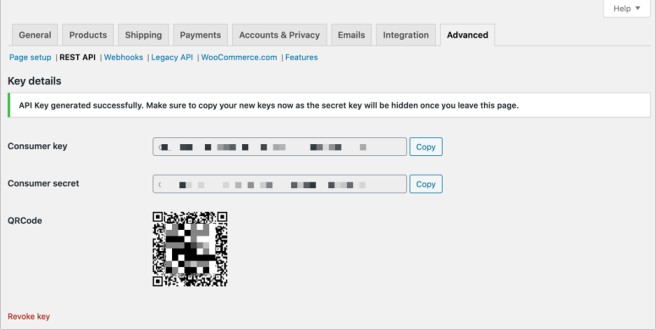
Save your consumer key and consumer secret in a secure place — you’ll need them to perform a Basic Auth. These two values will be saved in variables ($consumerKey and $consumerSecret in this example), will be encoded using a handy FileMaker function Base64EncodeRFC, and included with each API call.
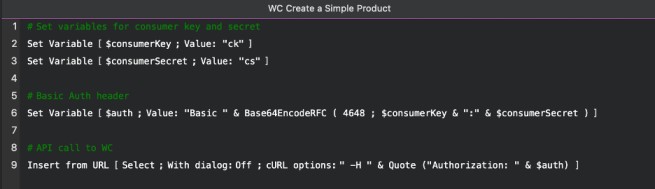
Let’s see how it will look like in FileMaker. Create a new script and save the header in an $auth variable:
Set Variable [ $auth; Value: "Basic " & Base64EncodeRFC ( 4648 ; $consumerKey & ":" & $consumerSecret ) ]
On the second line, add the Insert from URL script step and then reference that variable in your cURL options of the Insert From URL script step like so:" -H " & Quote ("Authorization: " & $auth)
We have only a few lines of code and we are already done with the authentication part! Let’s move on to creating products.
Creating a simple product
At this point, we are only a few steps away from creating our first product. First, adjust your Insert from URL script step by choosing Specify URL and entering the URL of your WordPress website + /wp-json/wc/v3/products/. Then, let’s adjust the cURL options of the Insert from URL script step. In addition to the header, we will specify the type of call (POST) and a body with a -d flag that will be stored in a $data variable (let’s leave it empty for now).
Combined all together, your cURL options will look like this:"-X POST" & " -H " & Quote ("Authorization: " & $auth) & " -d @$data"
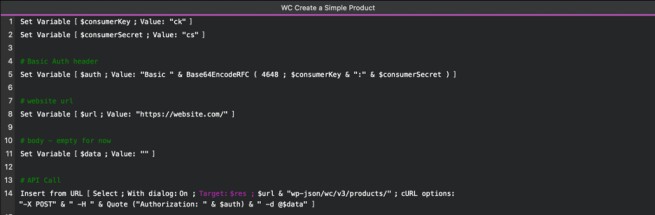
Try running the script now. If your authorization is valid, you’ll see a new product on your website.
Inspect the response (stored in the $res variable in the example above) carefully – you will see all possible options that you can include in the body of the request. Because we currently have an empty body, the new product doesn’t look very exciting. It doesn’t have a photo, is uncategorized, and is simply called a Product. This can be easily changed by specifying the body of the request ($data variable). This page has a detailed explanation of all product properties that you can include in your call. Use FileMaker’s native function JSONSetElement to create a body of the request.
Here is a simple example below. Keep in mind that you can add a lot more properties to your body including but not limited to shipping options, tax rates, categories, and more. We also recommend adding two other headers like Accept and Content-Type (both values will be “application/json”). Finally, it’s always a good idea to add this line at the end of the cURL options:
& " --trace $trace -D $dump"
This way, you’ll see two new variables in a data viewer that can be used to debug more complicated calls later on.
Adding pictures
As we just saw, it’s quite easy to add a simple WooCommerce product via the API. But things start getting more interesting when you start adding pictures and more complicated product properties. Ideally, a product needs at least one picture so let’s take a closer look at the product image properties: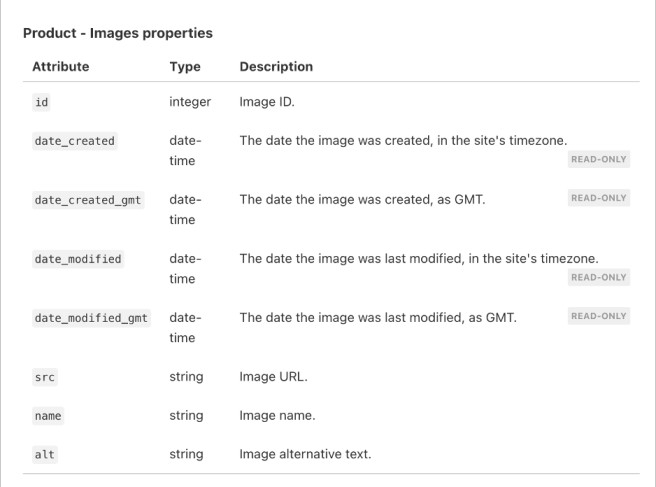
Out of all these options, the src is the most important one. This is an image URL of a photo stored in your media library and is a required field. You might also want to add the optional name and alt properties for SEO purposes. In theory, you could upload images via the website, copy their URLs and pass them as image properties when creating a product in FileMaker, but let’s automate that.
There is more than one way to upload photos to the web, but we’ll focus on one method — FTP upload. Alternatively, you can use third-party WordPress plugins that can be used to upload images directly to WooCommerce, but we won’t cover them today.
FTP Upload is the easiest way to automate the process of uploading photos for WooCommerce listings. To upload a photo, use the Insert from URL script step with these cURL options:”-k —ftp-ssl-ccc --user email:password -T “ & $image
The image variable referenced above is a container field that contains your photo. At the same time, email and password are FTP credentials (the same you would use to access the website via FileZilla, for example). For the URL, use the website URL plus the file name (along with the extension) and then pass this URL as the src to the script that creates the product:$websiteURL & “/images/” & $filename
This will work fine when adding a single photo to a simple listing since all we need is the URL of the uploaded image. For more complex uploads (variation photos, for example), use third-party plugins like WooCommerce Media API.
What is next?
WooCommerce offers a lot of useful features to streamline the store management process. Here are just a few possible enhancements that can be added on a FileMaker side to make your online store even more successful.
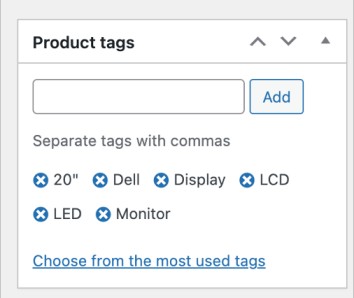
Add tags automatically
Product tags are used to help identify products by type so they can be found easily in your online store. In WooCommerce, tags are separate entities with their name, ids, and slugs (the part of a URL which identifies a particular page on a website in an easy-to-read form). Each tag is created separately and then connected to the product using the tag ID.
You could add tags manually using the WooCommerce interface, or you could have a separate FileMaker table where all of your tags are stored. When creating a product, extract the keywords from a product name and search in your newly created Tags table. If the tag already exists, simply copy the ID; if not, use this call to create a new tag, save it in the Tags table, and extract its ID from the response.
Create variable products
Simple products are great, but most online stores have more than one variation of the same product. Be it different colors, sizes, or product conditions, variable products allow you to specify the criteria and add variations of the same product easily. When you specify the product type to be variable, you create a shell for all of your variations. Each variation then becomes a part of that product with its own price, quantity, and images. Even though you can add only one variation photo by default, there are ways to customize it and add as many images as you’d like using the third-party plugins.
Improve your SEO
Do you want to watch your website rise the ranks to the top of search engine results? There is also a plugin for that! Yoast SEO is among the most popular WordPress plugins used to improve search engine optimization (SEO) that also has an extension specifically for WooCommerce. Combined together, these little plugins help immensely in marketing your products.
When Yoast SEO and its extensions are enabled, the product object gains new properties – focus keywords, MPN, short description for search engines, and more. Those values could be either added directly on the website or as additional objects in the product’s meta_data array when creating a new product.
FileMaker and WooCommerce is Powerful
As you can see, the Woo Commerce API can be used to automate simple tasks such as adding products to the website and boost your sales and improve the user experience. Add FileMaker to the mix, and you will get a custom and robust store management platform that can be tailored to your unique needs.
To learn more strategies of effective inventory management, please visit our recent post here.
Read more
Subscribe to get the latest in your inbox.

Built with you in mind
Speak to one of our expert consultants about making sense of your data today. During
this free consultation, we'll address your questions, learn more about your business, and
make some immediate recommendations.